Homemade Garlic Rolls

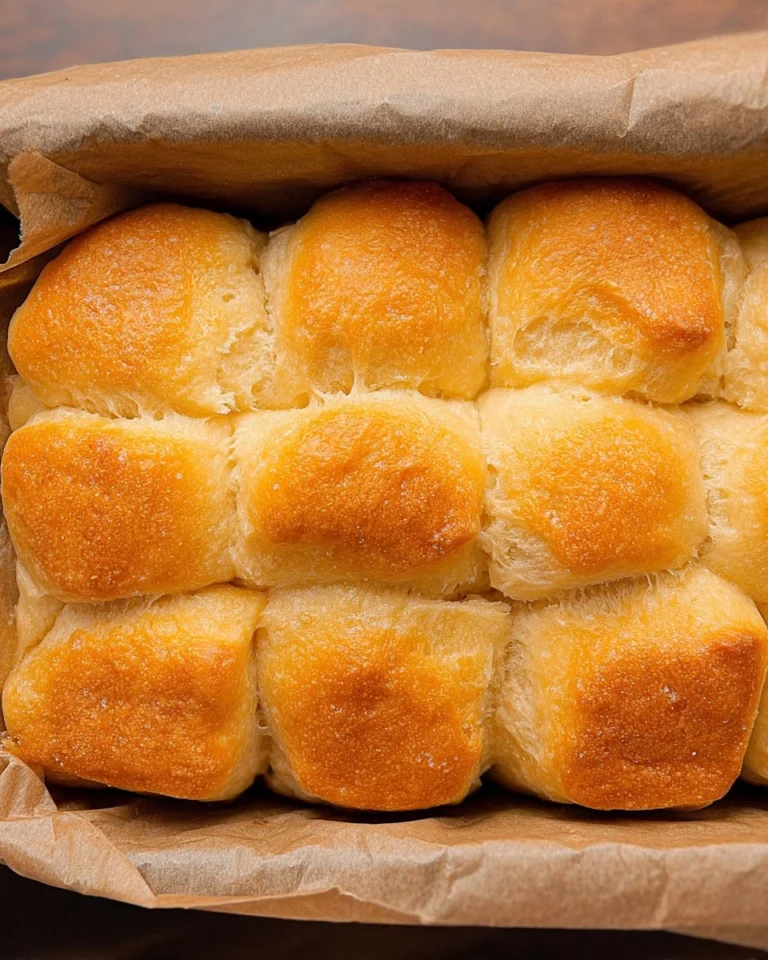
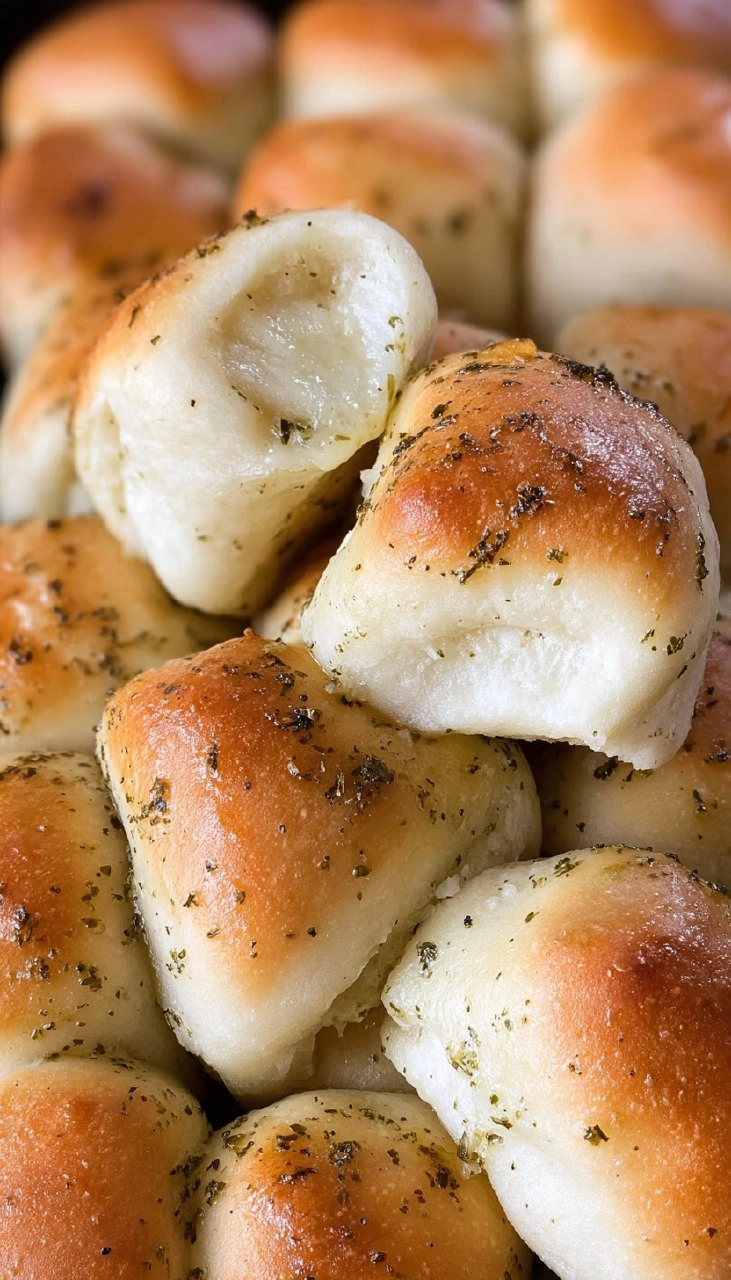
Homemade garlic rolls are a delightful, warm, and fragrant treat that can transform any meal into something special. These rolls have a tender, pillowy texture, crowned with a buttery garlic topping that pulls you in with every bite. Whether you’re serving them alongside a hearty pasta dish or enjoying them as a snack, they are sure to impress anyone who gets a taste. The beauty of homemade garlic rolls lies in their incredible flavor, which far outshines any store-bought version. Trust me, once you’ve sunk your teeth into a freshly baked garlic roll, you’ll be hooked.
Table of Contents
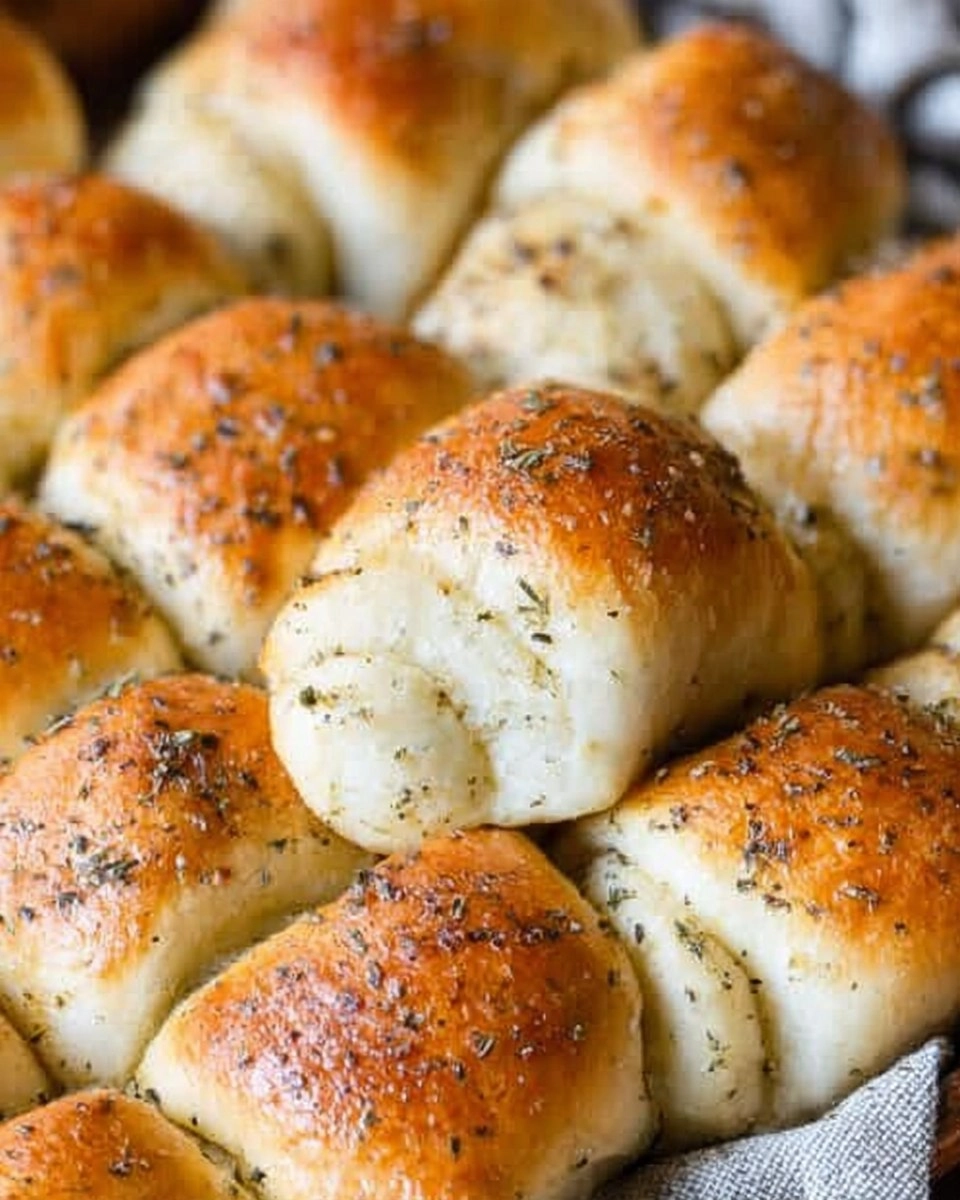
I remember the first time I baked garlic rolls in my kitchen. The aroma wafted through the air, creating a cozy atmosphere that made everyone feel welcome. I couldn’t wait to share them with family and friends. These rolls are not only easy to make, but they also bring a level of comfort that we all crave from food. If you’re looking for a homemade treat that’s budget-friendly and guaranteed to be a crowd-pleaser, you’ve come to the right place. So roll up your sleeves, and let’s dive into making these irresistible homemade garlic rolls!
Why You’ll Love This Recipe
- Simple & Quick: Takes about 2 hours from start to finish, making it perfect for a last-minute gathering.
- Irresistible Flavor: Buttery, garlicky goodness with a hint of Italian seasoning that complements so many dishes.
- Eye-Catching Appeal: Beautifully spiraled rolls that look and smell amazing on any dinner table.
- Flexible Serving: Great as a side for pasta, as a snack, or even for breakfast toasted with a bit of jam.
- Diet-Friendly Options: Can be adapted for various dietary restrictions with easy substitutes.
Ingredients You’ll Need
- 4 ¾ to 5 ¼ cups all-purpose flour: This is the base of your rolls, providing structure. Use unbleached for the best texture. You can substitute bread flour for a chewier roll.
- ⅓ cup granulated sugar: Adds sweetness and helps with browning. Light brown sugar can be used if you’re looking for a deeper flavor.
- 2 envelopes instant yeast: This ensures a quick rise and fluffy rolls. If using active dry yeast, let it bloom in warm water first.
- 1 ½ teaspoons salt: Enhances all the flavors. Sea salt or kosher salt works beautifully.
- ¾ cup milk: Adds richness. Whole milk is preferred, but you can use almond or oat milk for a non-dairy version.
- ¾ cup water: Helps achieve a soft dough. Use warm water to activate the yeast.
- ¼ cup unsalted butter: Adds flavor and tenderness to the dough. You can replace it with olive oil for a dairy-free version.
- 1 large egg: Provides structure and moisture. A flax egg can be used for a vegan alternative.
- ¼ cup melted unsalted butter: This will be brushed on top to create a delicious, buttery finish after baking.
- 1 teaspoon Italian seasoning: Imparts an aromatic flavor. Feel free to adjust based on your taste or even use fresh herbs.
- ½ teaspoon garlic powder: Enhances the garlic flavor. Fresh minced garlic can also be used for an extra punch.
How to Make Homemade Garlic Rolls
Mix the Dry Ingredients: Start by placing 2 cups of all-purpose flour, ⅓ cup sugar, 2 envelopes of instant yeast, and 1 ½ teaspoons salt in a large mixing bowl. Whisk them together until combined.
Heat the Wet Ingredients: In a measuring cup, combine ¾ cup milk, ¾ cup water, and ¼ cup unsalted butter. Microwave these until very warm (between 120° to 130°F). A thermometer is handy here, but it should feel warm, not hot.
Combine Wet and Dry: Pour the heated mixture into the flour mix. Beat this combination at medium speed for 2 minutes. Make sure to scrape the bowl occasionally.
Add the Egg and Flour: Next, add in 1 large egg and ½ cup of flour. Mix again at high speed for another 2 minutes until smooth.
Knead the Dough: Gradually stir in enough of the remaining flour to create a soft dough. The dough should feel slightly sticky but manageable. Transfer it to a floured surface and knead for about 8 to 10 minutes until it becomes smooth and elastic.
Rest the Dough: Form the dough into a ball, place it in a greased bowl, cover it, and let it rest for 10 minutes. If you want to prepare this ahead of time, place the dough in the refrigerator now to rise for 12 to 24 hours.
Shape the Rolls: After resting, divide the dough in half. Roll each portion into a 12-inch square that’s about ¼-inch thick.
Cut and Fill: Cut each square into 6 strips, then further divide each strip into 3 rectangles. In a small bowl, mix together melted butter, 1 teaspoon Italian seasoning, and ½ teaspoon garlic powder. Brush each rectangle with this melted butter mixture.
Roll Up the Dough: Fold each rectangle once and roll it into a spiral. Arrange these spirals in overlapping rows on greased baking sheets, making sure the shorter seam is facing down. Leave about ¼-inch space between each row. If there’s any leftover butter mixture, save it for later.
Let Them Rise: Cover the rolls and let them rise in a warm, draft-free area until doubled in size—this should take about 30 minutes.
Preheat the Oven: Preheat your oven to 400°F while waiting for the rolls to rise.
Bake the Rolls: Bake the garlic rolls in the preheated oven for 13 to 15 minutes, or until they’re golden brown and fragrant.
Cool and Brush: Once baked, remove them from the sheets and let them cool on a wire rack. Don’t forget to brush the hot rolls with the remaining melted butter mixture for that extra magical touch.
Serve and Enjoy: These delicious rolls can be served warm or at room temperature.
Storing & Reheating
Store your homemade garlic rolls in an airtight container at room temperature for up to 2 days. If you want to keep them longer, consider refrigerating them for up to a week in a sealed container, but they may dry out a bit. You can freeze the rolls for up to 3 months—just make sure they’re well wrapped in plastic wrap and then in foil. When you’re ready to enjoy them again, simply reheat in a 350°F oven for about 10-15 minutes until warm. The texture will be fresher if reheated in the oven rather than the microwave.
Chef’s Helpful Tips
- Avoid Over-Kneading: Kneading is essential for gluten development, but once your dough is smooth and springs back, stop!
- Temperature Checks: Allow your milk and water to cool from boiling; too hot can kill the yeast and prevent rising.
- Rising Time: If it’s cold in your kitchen, find a warm spot. An oven with just the light on or a sunny window works wonders.
- Flavor Bumps: Use fresh herbs or garlic in the filling for a gourmet upgrade.
- Experiment: Feel free to try different spices or cheeses added into the roll for added flavor variation.
Garlic rolls have a charm that makes them irresistible. Making them from scratch is a fantastic way to create memorable meals while indulging in the joy of baking. With their warm, buttery, and garlicky aroma wafting through your home, they’re sure to elevate any dining experience.
Try this recipe and bring something special to your table; your taste buds will thank you!
Recipe FAQs
Can I make the dough ahead of time?
Absolutely! You can prepare the dough and let it rise in the refrigerator for up to 24 hours. This will deepen the flavor.
Can I freeze these rolls?
Yes, you can freeze unbaked rolls. After shaping them, place them on a baking sheet and freeze until solid before transferring to a zip-top bag. Bake them directly from the freezer, adding a few minutes to the baking time.
What’s the best way to reheat leftovers?
For the best results, reheat your leftovers in the oven at 350°F for about 10-15 minutes. This keeps them fluffy and restores their freshly baked texture.
Can I use whole wheat flour?
You can substitute half of the all-purpose flour with whole wheat flour, but the rolls may be denser. Add a little more liquid if needed to achieve the right dough consistency.
More Dinner Recipes
Did You Enjoy Making This Recipe? Please rate this recipe with ⭐⭐⭐⭐⭐ or leave a comment.
📖 Recipe Card
Homemade Garlic Rolls
- Prep Time: 30 minutes
- Cook Time: 15 minutes
- Total Time: 45 minutes
- Yield: 36 rolls 1x
- Category: Bread
- Method: Baking
- Cuisine: American
Description
These homemade garlic rolls are bursting with flavor and easy to prepare. Made with simple ingredients like all-purpose flour, butter, and garlic powder, they make the perfect addition to any meal or a tasty snack on their own.
Ingredients
- 4 ¾ to 5 ¼ cups (589-651g) all-purpose flour
- ⅓ cup (67g) granulated sugar
- 2 envelopes instant yeast
- 1 ½ teaspoons salt
- ¾ cup (177ml) milk
- ¾ cup (177ml) water
- ¼ cup (57g) unsalted butter
- 1 large egg
- ¼ cup (57g) unsalted butter, melted
- 1 teaspoon Italian Seasoning
- ½ teaspoon garlic powder
Instructions
- Combine 2 cups flour, sugar, yeast, and salt in a large mixing bowl and whisk together.
- Heat milk, water, and ¼ cup butter until very warm (120° to 130°F) and pour into the flour mixture. Mix for 2 minutes at medium speed, scraping the bowl as needed.
- Add egg and ½ cup of flour, beating for another 2 minutes at high speed.
- Gradually mix in enough remaining flour to form a soft, slightly sticky dough.
- Knead the dough on a floured surface until it's smooth and elastic, which should take about 8 to 10 minutes.
- Cover the dough and let it rest for 10 minutes.
- For make-ahead rolls, place the dough in a greased bowl, cover, and refrigerate for 12 to 24 hours.
- Divide the dough and roll each half into a 12-inch square that is ¼-inch thick.
- Cut each square into 6 strips, and then into 3 rectangles.
- Mix the filling ingredients in a small bowl.
- Brush each rectangle with the melted butter mixture, fold, and roll into a spiral. Arrange on greased baking sheets, overlapping slightly.
- Cover the rolls and let them rise until doubled in size, about 30 minutes.
- Preheat your oven to 400°F.
- Bake the rolls for 13 to 15 minutes, until golden. Cool on a wire rack and brush the remaining butter mixture on top.
- Store rolls in an airtight container for up to 2 days.
Notes
For extra flavor, consider adding fresh herbs to the butter mixture before brushing the rolls.
If the dough is too sticky during kneading, gradually add a bit more flour as needed.
These rolls can be frozen for up to a month; just reheat in the oven before serving.
Nutrition
- Serving Size: 1 roll
- Calories: 180
- Sugar: 1g
- Sodium: 180mg
- Fat: 6g
- Saturated Fat: 3g
- Unsaturated Fat: 3g
- Trans Fat: 0g
- Carbohydrates: 26g
- Fiber: 1g
- Protein: 4g
- Cholesterol: 20mg